Remington MPS6017A Owner's Manual Page 15
- Page / 63
- Table of contents
- BOOKMARKS
- CORDLESS POWER MOWER 1
- SAVE THESE iNSTRUCTiONS 2
- SAVE TH ESE 5
- PRODUCT iDENTiFiCATiON 6
- 7 www.remingtonpowertools.com 7
- MOWER INFORMATION 9
- A WARNING 10
- • , WARNING 11
- 1Ylower 13
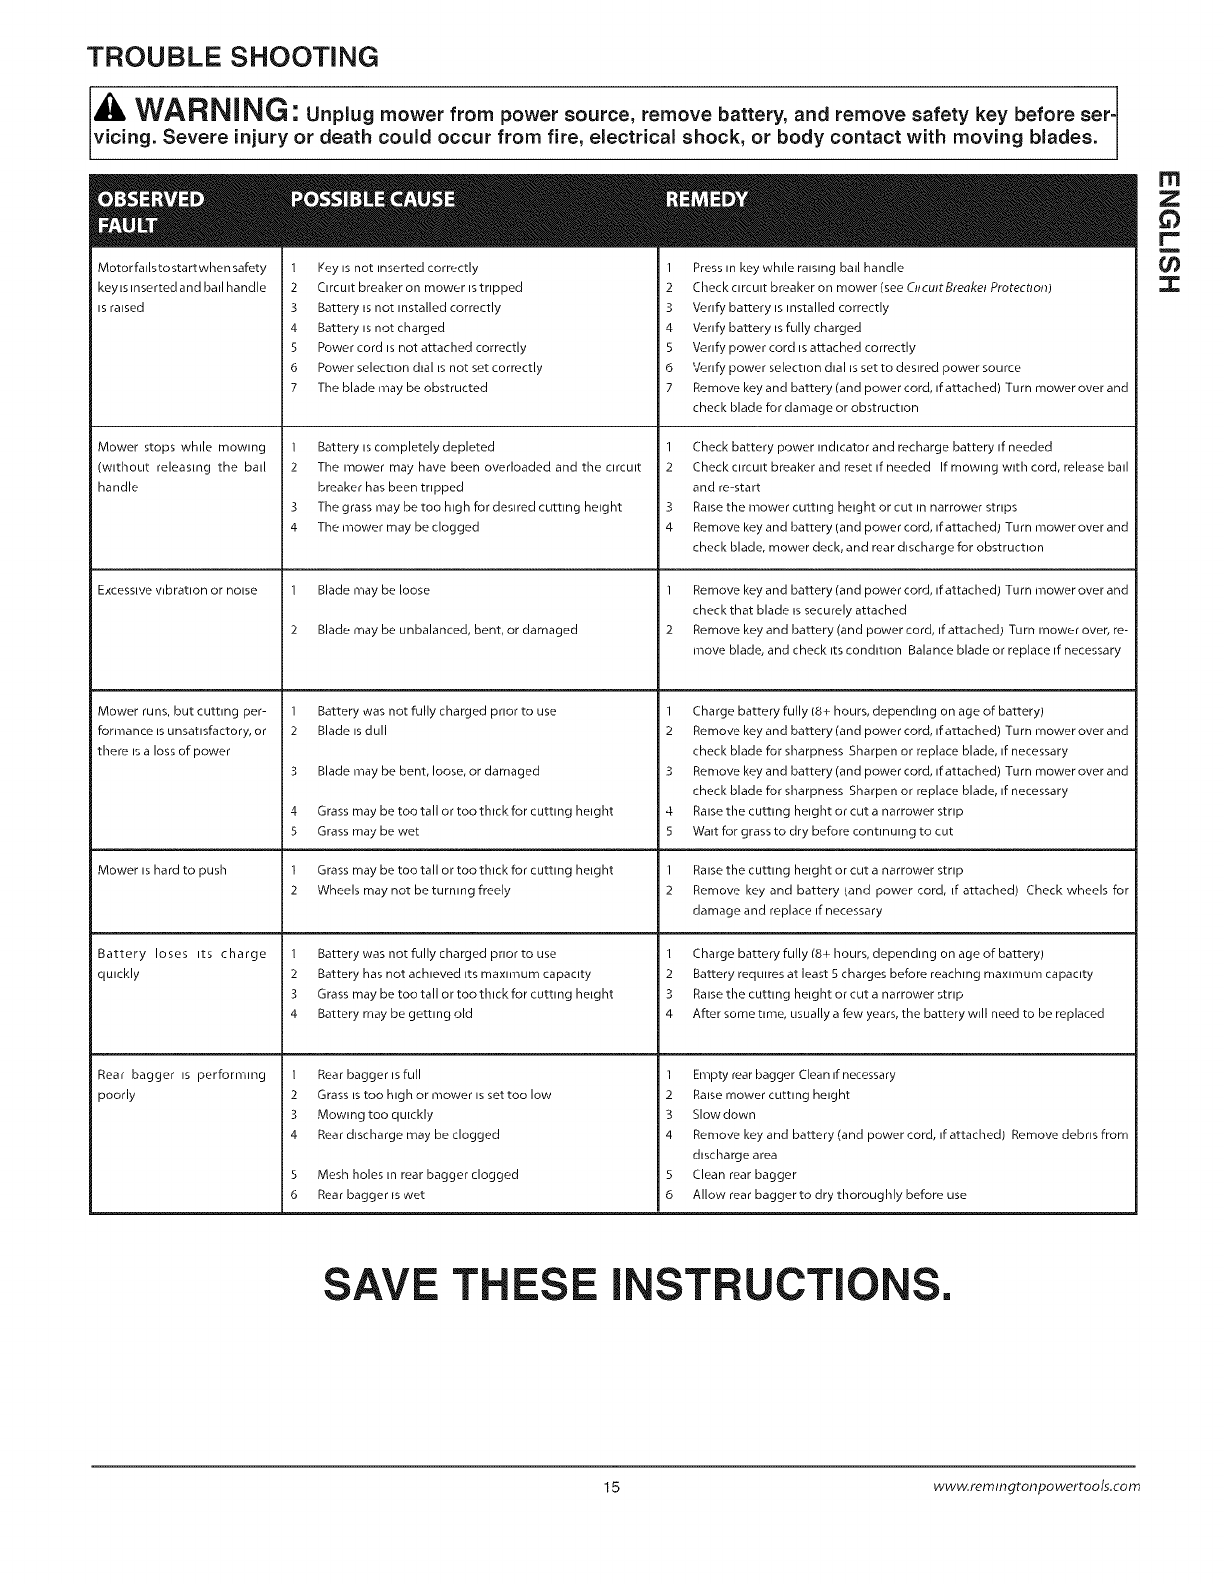
- SAVE THESE INSTRUCTIONS 15
- WARRANTY iNFORMATiON 16
- NOTES/NOTAS 17
- PODADORA 19
- GUARDE ESTAS INSTRUCCIONES 20
- ADVERTENCiA 21
- ADVERTENCIA 21
- - -ADVERTENCIA 21
- GUARDE ESTAS 22
- INSTRUCCIONES 22
- ESPECiFiCACiONES 23
- A ADVERTENCIA 24
- INFORMACION SOBRE LA PODADORA 26
- {NFORMAC{ON SOBRE LA PODADORA 27
- Enchufedeconexiona tierra 28
- / de [a podadora 29
- ,CUIDADO 30
- • , ADVERTENCIA 32
- MANTENIMIENTO Y LIMPIEZA 33
- Es dlficll empujar la poda 34
- 7} 71!i!!i 35
- GUIDE DE PROPR 37
- CONSERVEZ CES DIRECTIVES 38
- A MISE EN GARDE 39
- MISE EN GARDE 39
- IVlISE EN GARDE 39
- CONSERVEZ CES D{RECT{VES 41
- A MIS EN GARDE 42
- MISE EN GARDE 42
- ASSEMBLAGE DE LA 44
- TONDEUSE 44
- • , MISE EN GARDE 45
- A iVllSE EN GARDE 46
- IVliSE EN GARDE 46
- ;)isjoncteur 47
- ENTRETIEN ET NETTOYAGE 49
- AMIsEE.GA.DE1 50
- GARANTIES LIMITI_ES 52
- @miniNI L BLACK 53
- SCHC:MA DES Pli_CES 54
- SCH¢::iViADES Pli_CES 56
- SCHi_MA DES Pli_CES 58
- SCHI_MA DES Pli_CES 60
- 121807-01 63
Related products and manuals for Lawnmowers Remington MPS6017A
 (24 pages)
© 2020, manymanuals.com. All rights reserved. | 3.679 s |
 Manymanuals.com
 Manymanuals.de
 Manymanuals.fr
 Manymanuals.it
 Manymanuals.pl
 Manymanuals.cz
 Manymanuals.es
 Manymanuals-pt.com
Comments to this Manuals